Install a Mock Surveillance System: A Step-by-Step Guide to Dummy Cameras with Recording Lights
Selecting and strategically placing Dummy Cameras With Recording Lights is crucial for a convincing…….
Selecting and strategically placing Dummy Cameras With Recording Lights is crucial for a convincing mock surveillance system. Install them in high-traffic areas, adjust mounting options for realistic behavior, and test regularly to ensure optimal video quality. This guide provides a step-by-step process from setup to configuration, ensuring clear, detailed footage for enhanced security in vacant properties or problem areas.
“Enhance your facility’s security posture with our comprehensive guide on installing a mock surveillance system using dummy cameras with recording light. Discover how to strategically place these realistic yet harmless devices to mimic real surveillance, ensuring optimal video quality and lighting. Learn the intricacies of setting up a recording device, configuring connections, and fine-tuning settings for effective monitoring. By following this step-by-step guide, you’ll efficiently install a mock system that serves as an excellent training tool or deterrent.”
- Choosing the Right Dummy Cameras and Their Placement
- Setting Up the Recording Device: Connect and Configure
- Testing and Optimizing Video Quality and Lighting
- Installing a Mock Surveillance System: Step-by-Step Guide
Choosing the Right Dummy Cameras and Their Placement
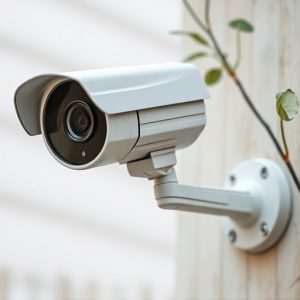
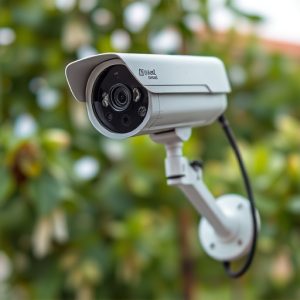
When setting up a mock surveillance system, selecting the appropriate dummy cameras is paramount. Look for models that feature recording lights to accurately mimic real camera functionality. These lights indicate when the camera is active, enhancing the realism of your setup. Opt for cameras with adjustable mounting options to allow for versatile placement—whether on walls, ceilings, or other surfaces. Positioning is crucial; place them in strategic locations, considering areas of high foot traffic or sensitive zones, ensuring a comprehensive view.
The goal is to create a convincing simulation, so realistic behavior matters. Arrange the cameras in a way that covers key angles without overlapping fields of view, providing a complete surveillance network. Dummy cameras with various designs and sizes can help blend them into your environment seamlessly. Regularly test their functionality, including recording and motion detection (if available), to ensure they operate as expected, contributing to an authentic mock surveillance experience.
Setting Up the Recording Device: Connect and Configure
To begin setting up your mock surveillance system, focus on installing and configuring the recording device. Start by connecting your dummy cameras with recording light to a power source. Ensure each camera has adequate lighting to mimic real-world conditions effectively. Next, link these devices to the central recording unit using the provided cables or wireless connections, depending on your setup.
Configure the recording settings according to your needs. This may involve setting resolution, frame rate, and storage capacity. Organize recordings into folders for easy retrieval and ensure the device is set to record continuously or at specific intervals as required by your simulation scenario.
Testing and Optimizing Video Quality and Lighting
When setting up a mock surveillance system, testing and optimizing video quality is crucial for ensuring clear and detailed footage. Start by installing your dummy cameras at strategic locations around the area to be monitored. These cameras should ideally have adjustable settings, including resolution, frame rate, and IR sensitivity. Use Dummy Cameras With Recording Light to mimic real-world conditions; these lights help maintain proper illumination during testing, allowing for optimal video capture.
Next, adjust camera angles and placement to find the best viewpoints. Test different lighting conditions throughout the day to ensure consistent image quality across varying levels of natural light. Utilize reflection and shadow to assess how well your system handles contrast and clarity. Regularly review footage on a large screen or monitor to check for any distortion, pixelation, or other issues that might indicate subpar video quality or incorrect camera settings.
Installing a Mock Surveillance System: Step-by-Step Guide
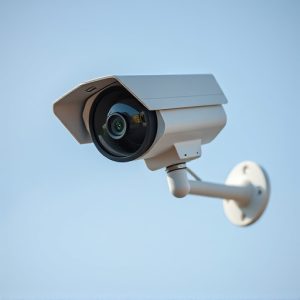
Installing a mock surveillance system is an effective way to create a secure environment, especially in vacant properties or areas needing enhanced security. This step-by-step guide will walk you through the process using dummy cameras with recording lights as the main components.
Begin by identifying the locations where the dummy cameras will be installed. These could be strategic points around the perimeter of a building or specific zones within a space. Next, ensure all necessary equipment is on hand, including the dummy cameras, power cables, and recording devices. Mount each camera at the chosen location, securing them firmly with appropriate hardware. Connect the cameras to the recording device using the provided cables, ensuring proper synchronization for seamless recording. Test the system by powering on the cameras and verifying clear images are being recorded, providing a comprehensive mock surveillance setup ready for use.
Implementing a mock surveillance system is a practical way to test security protocols without breaking the bank. By strategically placing dummy cameras with recording lights in key areas, you can simulate a comprehensive surveillance setup. Following the step-by-step guide outlined in this article—from selecting the right equipment to testing video quality and lighting—ensures an effective, realistic training environment for your business or facility.